Dandelion Flower Jellies

A healthier take on a classic snack

I follow a lot of websites and groups that forage for wild edibles. The best option I have for gathering in my area is my 1/4 acre urban backyard.  I try to set aside areas that “invasive” weeds are allowed to grow in. This takes advantage of their many uses and provide resources for pollinators. Dandelion flowers are especially important as honey bee food this time of year. The bees are just emerging from hibernation, there is little blooming, and hobbyists are installing packages. There are many yummy things you can make from dandelion flowers-wine, fritters, simple syrup-just to name a few.  After seeing so many pictures of lemon yellow jelly on blogs I decided I need to try that project myself. There was just one problem. I had no pectin. It can’t be found at the grocery store right now . On-line options were out of stock or had crazy prices for such a small amount.  But I did have other ingredients and creativity. I decided to make jellies instead. Both ideas have similarities and jellies are certainly easier for kids (and some adults like me who are intimidated by canning) to make.

Dandelion Flower Jellies

Step 1-pick about two cups of dandelion flowers. Do this in the morning when they have just opened. Choose the biggest ones you can find and watch out for bees who will also be having breakfast. Kids can help with this.

Step 2-peel off the green sepals/calyx. There are several different strategies for doing this. Try your best, it is not a big deal if some green parts get in. Having  only the yellow flowers is supposed to reduce the bitterness. I basically broke the flower in half and either peeled off the green calyx from each half or pulled the disc flowers out of the center. Discard the green parts, place the yellow parts in a large jar. Children might enjoy helping with this part or not. It depends on their attention span and frustration level. It is time consuming. I am convinced that I would not have survived life as a pioneer woman on the prairie. At least most of them got a break and left the house on Sunday.

Step 3-Pour boiling hot water over the flowers and let steep in the jar for 24 hours. You are making an infusion.

Step 4-Strain out the flowers for two cups of clear liquid. I was expecting something lemon yellow but what I got was quite dark.  I was worried but in the end I got a lovely color. Not what I saw in the blogs for making jelly but who knows if they photoshop-I do not.

Step 5-reserve out 1/2 cup of liquid. Add in 4 packets of unflavored gelatin. Whisk until well mixed. This is something a child can help with.

Step 6-Bring the rest of your infusion to a boil on the stove. Turn off the heat and add in 3/4 cup of honey. Add in your gelatin mixture. Add in the juice of 1/2 of one large lemon. Whisk until clear. Add in 5 drops of lemon essential oil if you have some. Stir.

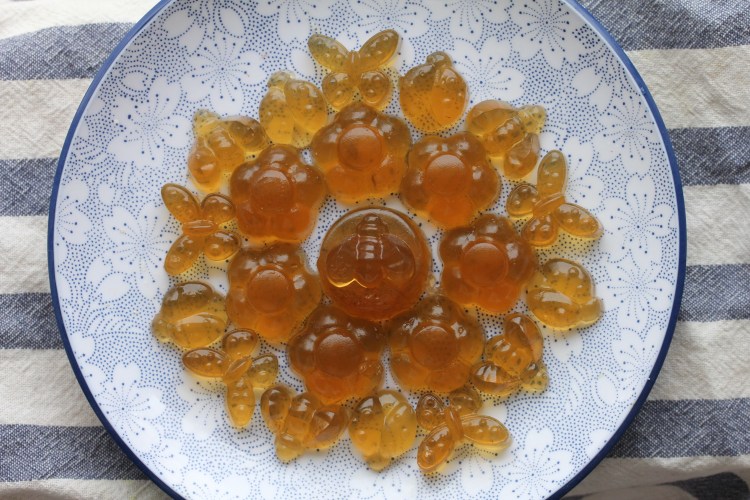
Step 7-Coat some silicone candy molds with a neutral tasting oil. Coconut is a good choice. Place the molds on a cookie sheet/baking tray. Pour your liquid into the molds. Refrigerate for several hours until set.

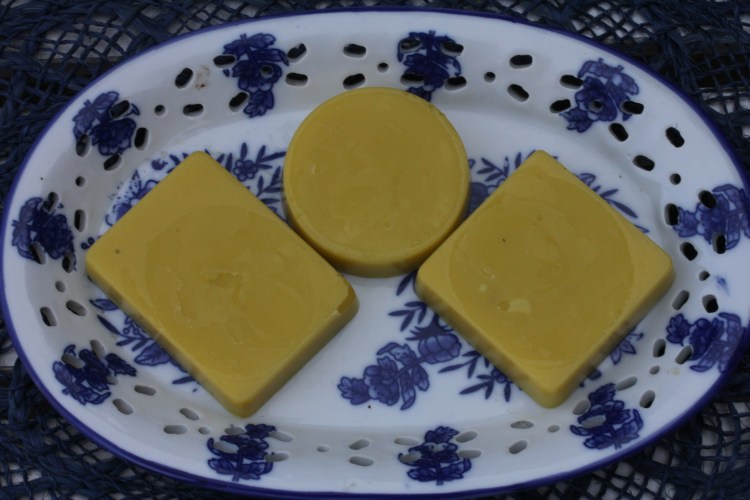
Step 8-Remove the jellies from the mold. They should release easily if truly set but if they don’t, flip the mold over onto a large plate and run it under hot water for a few seconds. Then try again.

Store in the refrigerator and consume within one week.

My girls gave these jellies a high rating for taste and texture. Somehow the honey, lemon, floral, and bitter flavors really work well together. What a great and very appealing way to get children to consume a dandelion infusion.

Taraxacum officinale flower iced tea

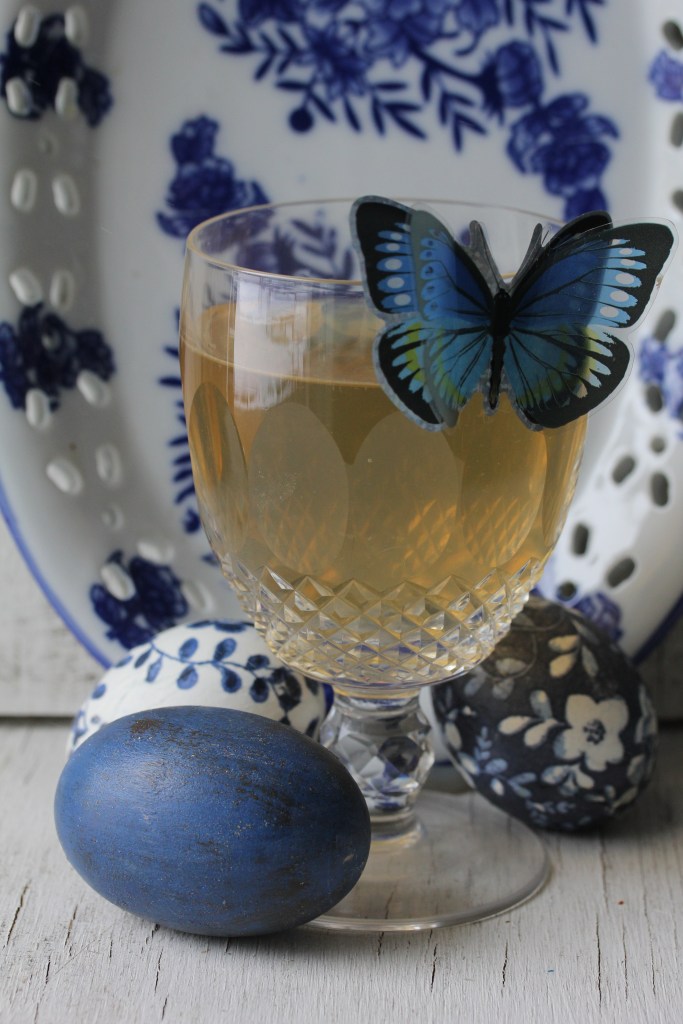
I had quite a bit of infusion left over. I added a bit of lemon juice and honey. It really does have an amazing but subtle taste as an iced tea. .Very different than a hot tea of dandelion root. Perfect for a day that should be about egg hunts and spring but instead fills like January in a blizzard.

Dandelion is thought to be a fantastic blood purifier that supports the body to clear toxins and wastes from the blood and various organs. It is very cooling, helping to remove heat, infection, and water retention from the tissues. I find a tea of dandelion flowers to be very calming and nurturing. It can reduce stress, muscular tension, and depression. Any emotions like fear or anger that get stored in the kidneys or liver can be released.

What things do you find nurturing during these long days in isolation.

Fumigating with Juniper Smoke

Herbal Incense

It took me ten years to figure out that I had a hidden treasure in my garden. I remember juniper bushes from my childhood in the 1970’s. They were a popular landscaping bush, adding texture and shape to the yard. They are considered to be drought tolerant and fast growing, As bushes they fill in large spaces, are evergreen all year round and create a barrier. But eventually they becoming invasive, hard to remove/kill, requires skill to trim/groom, and leaving “splinters” under /an allergic rash on the skin. Juniper is no longer as popular. They are disliked for many reasons and people regret having these “ugly” bushes as ancient stubborn tenants. All these features alone should have been a clue to the powerful healing potential that this species has. But I had to learn about it late in life from my recent studies in traditional medicine of the Southwest.

It started with a  liniment. An experiment and resolve that nothing in my garden that has the ability to heal should ever go to waste. Juniper in combination with other herbs like mugwort helped me to heal from a really bad fall last summer. External application resolved the immediate bruising and swelling. Over time it helped heal the injury to muscle, bone, and ligaments. It especially helped with circulation, inflammation and pain. I have come to respect and appreciate the juniper bushes in my yard.  I can’t imagine cutting them down and removing the roots with machinery. I have found a way to include them in my plan for the healing garden.

Juniper berry tea is thought to help the kidneys to purify the blood and remove wastes from the body. It may support the body to clear toxic chemical residue from the lungs of smokers. Inhaling the steam from an infusion has been used to treat respiratory infections. The berries have a long culinary history as providing flavor to meat and vegetable dishes . They are a digestive aid and stimulate the appetite.  Juniper makes a good gargle for a sore throat. However because it is so powerful it should only be used under the supervision of a healthcare provider for internal use.

Mandala of Juniperus communis

Did you know that juniper tea was used to disinfect surgical equipment in the past? During epidemics the smoke was used to purify homes and buildings. Juniper is burned  all over the world to protect and create sacred space . Growing up in New Mexico I associate the smell of burning cedar, juniper or pinon with winter. It brings to mind walks during cold, crisp nights. I can’t help but think of Christmas shopping in Sante Fe, and many other  childhood memories. I do not burn candles or processed incense but lately I have been using a lot of juniper and other dried herbs. I feel comforted knowing the healing properties in the smoke may be killing germs and purifying my environment. I believe that its energy is protecting my family and I feel less stressed due to the associations the smell brings to mind.

What things are you doing to create a healthy space in your home right now?

Winter Shampoo Bars with ROSEMARY and Bay

Winter day greens and blues

Self-isolation is even more challenging when there is 6 inches of snow on the ground. The girls can’t even ride their bikes in circles around the cul de sac. We depend on the library to homeschool and we are competing with my husband for precious bandwidth. There are suddenly so many reasons to begin their apprenticeship. I started studying medicinal herbs when I was 12 years old. Our formal lessons this week included reading lots of books, playing games with botanical themes, and some fun project based learning. Shampoo bars are really easy for kids to make and we already had all the ingredients here in the house. No need to shop or order anything on-line.

Rosemarinus officinalis

I have to overwinter my rosemary in the house. It currently lives in my kitchen and seems to be pretty happy there but I have to remember to water it.

Rosemarinus is an evergreen shrub in the mint family, cultivated worldwide for its aromatic leaves. It can vary in size and shape depending on the variety. Some cultivars appear as small bushes, while others trail over low walls. Look for ash colored scaly bark on the numerous lengthy branches. The leaves are 1 inch long and very narrow, leathery, dark green on top, and downy white underneath. You will notice a prominent central vein and margins with rolled down edges. The plant produces lots of small delicate two lipped, blue flowers at its tips. Rosemary likes dry sandy soil, lots of sun and a warm/temperate climate. It will tolerate the the drought of the dessert better than cold, snowy winter.

The volatile oils in rosemary are very stimulating in the body, moving blood and stagnation. They help to increase liver/galbaldder function and the production of bile. This plant raises blood pressure and improves percirculation. It increases metabolism and the processing of sugar and fats.

The nervous system loves rosemary. Headaches depression, stress, vertigo, epilepsy, concentration and memory loss may often improve with use of this herb. We find rosemary as a culinary spice because it can relieve gas, poor appetite, bloating, vomiting, and other digestive issues.  This herb moves energy so well that it could be helpful for any issue related to the menstrual cycle, the heart, poor circulation and inflammation. This plant has a history of being used for asthma, respiratory issues/infection, high blood pressure, cardiopulmonary edema, cold hands/feet, adrenal fatigue, stress, anxiety and cancer. Therapeutic use is best reserved externally to treat sore muscles, bruises, sprains, wrinkles, dry skin, eczema, neuralgia, poor circulation, cellulite, and rheumatism. Rosemary is often used as an ingredient in shampoo to prevent dandruff, gray hair and hair loss. As a gargle it has been used to treat sore throat, bad breath, gum disease, and sores.

Parts used: Leaves

Energetics/Taste:Warming, spicy, bitter and drying

Element:Fire

Contraindications:Avoid therapeutic doses during pregnancy and if you have hypertension. Large doses can cause poisoning.

I happened to find the fresh bay leaves at the grocery store and knew I needed to find something to make with them as well. Bay is thought to help digest and assimilate food. It is a useful poultice for bronchitis, coughs, or congestion. It has a history of being used to treat arthritis, colic, gas, indigestion, cramps, flu, dandruff, memory loss, sore muscles, sprains, fungal infections, and headaches. Like rosemary it may improve circulation to the scalp and is a good choice for an ingredient in a shampoo bar.

Bay and Rosemary Shampoo Bars

You will need

1 pound of goat milk and glycerin, Melt & Pour Soap Base. (kids can use a butter knife to help cut this up into squares/chunks).

2tsp of castor oil (kids can measure and add this to pot)

1tsp of shea butter (kids can add this to the pot)

1TBSP of finely diced fresh rosemary and bay leaves (kids can add these to the pot)

10 drops of rosemary oil essential and 10 drops of bay essential oil

Soap mold

Double boiler

Rubbing alcohol (optional)

Gently melt the cut solid soap squares over a double boiler. Once all liquid, remove from heat, add in the other ingredients. Stir until well mixed. This will be hot so kids should be closely supervised.

Kids can spray the soap mold with rubbing alcohol. This will prevent bubbles.

An adult should probably pour the liquid into the mold.

Place the mold into the freezer. Remove the shampoo bars from the molds when totally set.

Bars can be wrapped with wax paper or placed into cellophane envelopes. These make really nice gifts or items to sell at a craft bazaar.

What DIY projects are you making at this time?


Lotion Bars Made from Calendula Oil

Oil Extraction of Calendula

Sometimes I hesitate to strain and finish my products because the herbs in the oil are so pretty. This particular oil infusion contained comfrey leaf, calendula , and yarrow harvested from the garden last summer. I am just getting around to making salves from it. Infused oils are one of the easiest things to make. You just loosely pack a jar with dried herbs and then fill it to the top with organic US olive oil. Just make sure the herbs are entirely covered with the oil. Let it rest for at least 6 weeks before straining out the the herbs.

Comfrey is thought to be good for soothing and protecting damaged tissues. It may help dry, rough, or wrinkled skin. It can be used on burns, bruises, eczema, scars, sunburn, and acne. Because it heals and regenerates the skin so quickly it should not be used on deep or puncture wounds where bacterial infection could be a problem.

Calendula is thought to be good for reducing infection, inflammation, and scarring. It has been used to stimulate white blood cell production and help the tissue granulate after injury. It could inhibit the growth of many micro-organisms. It might be useful for fungal infections, boils, bruises, bunions, burns, chapped skin, cradle cap, diaper rash, eczema, insect bites, sunburn varicose veins and wounds.

Yarrow is thought to increase circulation and promote tissue repair. It stops bleeding. It is helpful for all skin issues including blood blisters and severe acne.

Easy To Make Lotion Bars

Between spring break and being stuck at home away from friends and our usual activities we are bored. No being so busy and having to drive has freed up time and energy for me to focus on other things. It is suddenly very easy and about time to involve the girls more in the pharmacy. Lotion bars are a fun and easy thing for kids to make, especially when you have a lot of the oil leftover from making salves. We have seen these at fairs, markets, and stores. Why not make our own? We had all of the ingredients. Just make sure to supervise children closely when making lotion bars since you are using a stove and the liquid will be hot. We plan to save ours for gifts or to sell at a local kid’s market for families who homeschool.

Lotion Bars

Melt 1/4 cup of coconut oil, 2 cups of cocoa butter in a double boiler over medium heat.

Add 1/4 cup of infused oil

Add 1/2 cup of grated or beads of beeswax

Once it is all melted dip a spoon into the liquid and place it into the freezer for a few minutes . Test the consistency. Add either more beeswax or more infused oil until you have what you want. It should not be as hard as homemade soap but it should not be as soft as salve. Pour into soap molds. Remove when solid.

When rubbed on the skin it should make it feel soft, smooth, and silky.

What beauty products have you made from herbs lately?

Candied Orange Peel

Nature’s sweet Vitamin C

I can’t believe we never tried to make these before. Not just because they are so easy and kid friendly but also because candied orange peel tastes fantastic. They are pretty too and would make a great gift (especially if they were dipped in dark chocolate). We are each eating about one orange and day. They are in season and very good right now, they are one of few fruits I can buy a large quantity of at the grocery store, and they are high in vitamin C. So we have a lot of peels. I love that those don’t have to be wasted, we don’t compost them. With this project you get the benefits of the oranges two times. With the peels being even higher in vitamins and healing properties than what you normally would eat. I gather the peels over the course of a week and store them in a bag in the refrigerator until needed. Not more than seven days or they will start to go off and mold.

Candied Orange Peel

Start with the peels of 6-10 oranges (assuming you washed them before eating). You don’t need to remove anything but the stickers. Cut into strips about 2-3 inches long and 1/2 inch wide. Feel free to cut off any bits that don’t work for the shape you want etc. These you can discard or try drying. A note about drying-there must be no mold on the peels if you use a dehydrator. They can burn unexpectedly in the oven even at the lowest setting.

Place prepared peels in a bowl. Pour boiling water over them. Rinse with cold water. Repeat once more and drain. This removes any bitter taste from your final product.

Place 2 cups of water in a large pot. Bring to a boil and add 1 cup of granulated sugar. Let that dissolve.

Add your orange peels. On low heat let simmer. Stir and watch until the liquid becomes a syrup and absorbs into the peels. When there is no syrup left in the pot, remove from heat and let cool until you can handle the peels. Liquid sugar can get very hot and burn so kids should not be left unsupervised if they are helping with this project.

Dump about 1 cup of granulated sugar onto a large plate. Roll the peels in the sugar, both sides, to coat lightly. Place on a cookie sheet or cooling rack. You can use parchment paper but ours did not seem sticky enough to warrant that. Let dry for two days.

Remove and store in an airtight container. You can also freeze them for longer storage.

Citrus

Besides vitamin C there are other healing uses for fruits in the citrus family. The peel specifically is thought to be anti-bacterial. It is high in anti-oxidants (could prevents cancer/tumors) bio flavinoids (could strengthen blood vessels and tissues) coumarin (found in turmeric) and other nutrients. Orange peel increases circulation and removes dampness. It may support “the spleen” , liver and gallbladder. It is best known as a digestive to address symptoms of bloating, constipation, gas, indigestion, nausea, and hiccups. We like our candied peels as a light desert after dinner. They may taste like candy but I think one a day is plenty especially if you are prone to acid reflux or are sensitive to citrus. Of course orange peels make a great addition to baked goods. I really like them in scones or sugar cookies.

Are you doing any stress baking or cooking? What has been you favorite food creation this week?